|
|
|
T300 Mikuni Carburettor
Maintenance |
|
|
|
|
Jetting |
|
|
|
|
||
|
Carburettors are designed and configured to provide a correctly proportioned
mixture of air and fuel to your engine for all throttle positions. For petrol
engines, an air/fuel ratio of: 12.6:1 provides maximum power 15.4:1 provides the best economy 14.7:1 provides the best balance (power/economy) In any carburetted engine it is the jets that control the metering of
fuel, and their sizes are matched to the airflow that can be achieved through
the engine allowing for its overall design - from its airbox
through to its exhaust. Therefore the only reason that the stock jetting would really need to
be altered is if any modifications are made to the stock bike that alter its
engine’s airflow, such as a less restrictive air filter or a more
free-flowing exhaust. There are typically FOUR types of adjustment that are normally carried
out on the stock Mikuni carburettors: 1. Adjustment of the pilot air screw 2. The pilot jet size 3. The jet needle position 4. The main jet size It is important to realise that these adjustments affect performance
at specific
throttle openings not at particular engine revs, and the effects of
these adjustments can overlap to some degree, as can be shown by the
following diagram: |
|||
|
|
|||
|
|
|||
|
|
|
||
|
|
|||
|
|
It is impossible to provide detailed jetting information that will
cover all possible permutations of modifications, so I will use my own
Triumph Bitsa project bike as an example of the
types of alterations I have tried over the years as a very basic guide |
||
|
|
|||
|
|
|
||
|
|
|||
|
|
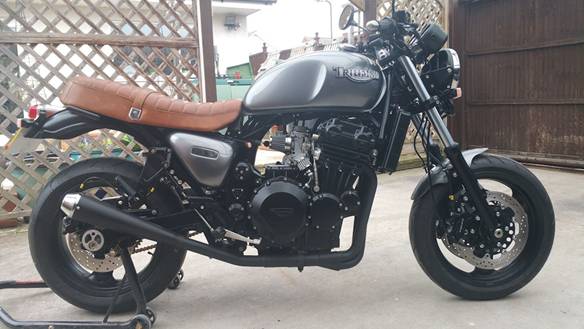
For the start of my project build, I decided to
simplify and lighten the bike by using pod air filters and a three-into-one
exhaust system. The carburettor’s stock jet sizes are mains: 130
pilots: 40. Mikuni jet sizes increase in 2.5 increments. So I
used the following rough guide to decide what jet sizes I should initially
start with: |
||
|
|
|||
|
|
Modification |
Main
Jet |
|
|
|
Replacing stock airbox
with pods |
+2 |
|
|
|
Replacing stock exhaust with 3-into-1 system |
+2 |
|
|
|
|||
|
|
For every +3 increase in mains jet size increase
pilot jet +1 |
||
|
|
|||
|
|
So to begin I installed 140 main jets and 42.5 pilot
jets, set the pilot air screw to a starting position of 3 turns out from
closed, and the jet needle in position four. Ideally when testing jetting, a dynamometer with
CO2 and Lambda sensors should be used. But as I do not have those facilities,
I decided to use the old-fashioned manual method as described below. With significant modifications like these, it was
necessary to first validate the main jet size based on outright performance
with the throttle fully opened. I selected a long straight road and with fourth
gear engaged, I made sure I could rev out on full throttle to the red line. I
kept an eye on the engine temperature just in case I was running a bit lean
which would have made the engine start to overheat. Next, I had to validate the pilot jet size and
pilot air screw position to give a steady idle and smooth throttle response
from closed throttle to ¼ throttle. To accomplish this I started with a warm engine
set at a steady tickover and made sure the
carburettors were balanced. I then checked that blipping the throttle would
bring up a quick and smooth increase in revs, and a smooth and swift drop
back to tickover. I then took the bike out on the same straight
stretch of road, and made sure that the bike pulled away cleanly from tickover under load, and would smoothly accelerate up to
¼ throttle. Again, I kept an eye on engine temperature to ensure that I did
not accidentally run the bike too lean. A good tip for pilot jet sizing is that if you find
you have to use a pilot air screw setting more than 3 turns out to achieve
the above results, then you would be best advised to go up a size on your
pilot jet and start again with a 2 turns out setting. Finally I needed to validate the jet needle position
that would bridge the pilot and main circuits and give a smooth throttle
response between ¼ and ¾ throttle. I tested the jet needle by using the same stretch
of straight road, and performing second, third, and fourth gear roll-ons
between ¼ and ¾ throttle. For the initial build I found the 140 main jets
and 42.5 pilot jets to be the correct sizes, but I needed to raise the jet
needle to position 5 and add a 0.5mm spacer washer under the jet needle clip
to raise it a little further. I rode the bike for a couple of months, and at
intervals checked the condition and colour of the spark plugs to double-check
my adjustments. In all the tuning tests outlined here, they had the
appearance shown below. |
||
|
|
|
||
|
|
|
||
|
|
|
||
|
|
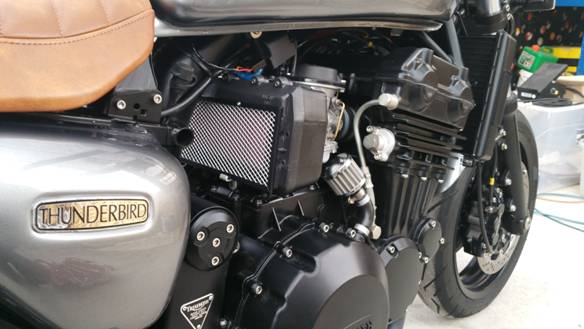
Although the bike performed well overall, I was
not happy with the pod filters for three main reasons: 1. Poor fitment match to the carburettor intakes 2. Slide chatter at high speeds due to low intake
air pressure 3. Loss of mid range in comparison to the stock airbox So for my first revision, I decided to reinstate
a modified version of the stock airbox with its
rear part and the snorkels removed, and an aluminium grill fitted to protect
the K&N air filter element fitted. |
||
|
|
|||
|
|
|
||
|
|
|||
|
|
With these modifications, I found I had to reduce
my main jets down to 137.5s, remove the 0.5mm spacer washers from my jet needles,
and adjust my pilot air screws to just 2.75 turns out from closed. This solved the fitment and slide chatter issues
completely, but only partially improved the loss of mid range. Further research shed light on the reasons why.
Triumph’s design of their stock airbox system
actually has a purpose! They tuned the shape and capacity of the T300 airbox to provide a resonance of air supply to the engine
that boosts its mid range where valve overlap has its most negative effect. A full explanation of the science involved can be
found here. Armed with this knowledge, I then looked for a
solution of emulating its effect in a space that could be accommodated on my
bike. I found that my best option was to fabricate my
own aluminium design that was as close as possible to the key dimensions of
the stock system, but that would sit behind my side panels |
||
|
|
|||
|
|
|
||
|
|
|||
|
|
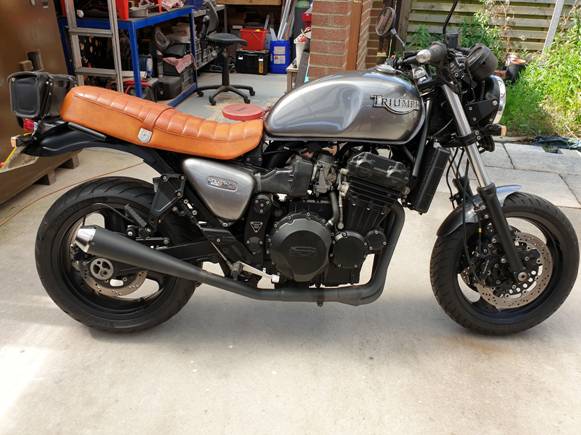
For aesthetic reasons, certain compromises had to
be made. I had to slightly reduce the two apertures of the main airbox assembly, and house the snorkels back inside a larger
auxiliary airbox design in order to fit. But the modifications had a dramatic effect, and
restored my missing mid range, with only a slight sacrifice of top end
performance. That was a compromise I could happily live with! For this second revision, reducing the main jets
down to 132.5s and leaving all other settings the same gave me perfect
fuelling, and this is how I have been riding my bike for the past two years! |
||
|
|
|||
|
|
|
||
|
|
|||
|
|
I would also add that I have fitted Trident 750
pistons to the bike to raise the compression ratio from the standard 10.6:1 to
12:1 to increase the power output of the bike. I have found that changing the
compression ratios in this way required no modifications to be made to
jetting. If you have a few minutes spare and would like to
get a better understanding of what actually goes on inside your carburettors
when they are running then I would thoroughly recommend watching this video here. |
||
|
|
|||
|
|
|||
|
|
|||
|
|
|||
|
|
|||
|
|
|||